 Wansview Cloud Docs
Y1 Quick Installation Guide
Product diagram, setup, indicator lights, and FAQ for the Wansview Y1 outdoor security camera.
Y1 Quick Installation Guide
Product Diagram
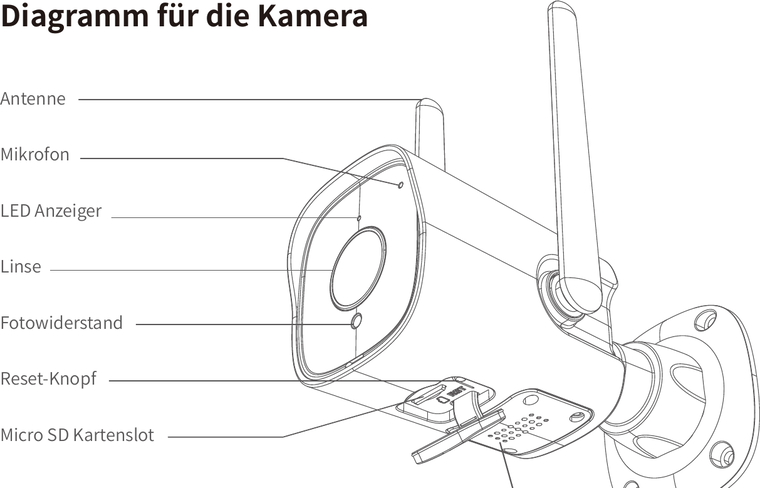
- Antenna
- Microphone
- LED Indicator
- Lens
- Photoresistor
- Reset button
- Micro SD Card Slot
- Speaker
What's in the Box

- Camera
- Mounting Bracket
- Power Adapter
- Mounting Hole Template
- Screw Pack
Indicator Lights Status
| Light Status | Camera Status |
|---|---|
| Red light on | The camera is powered on |
| Red and blue light flash alternately | The camera is waiting for connection now |
| Blue light flashing | The camera is connecting to the network now |
| Blue light on | WiFi connection successful |
| Red light flashes quickly | 1. Reset the camera to factory setting 2. The camera is upgrading the firmware |
Please make sure your router is connected to the Internet.
Setup
Download and install the app
Go to the App Store or Google Play to search for the Wansview Cloud app and download it to your smartphone, or scan the QR code on the guide to download the app.
Register an account
Open the Wansview Cloud app and register an account with your email, then activate it.
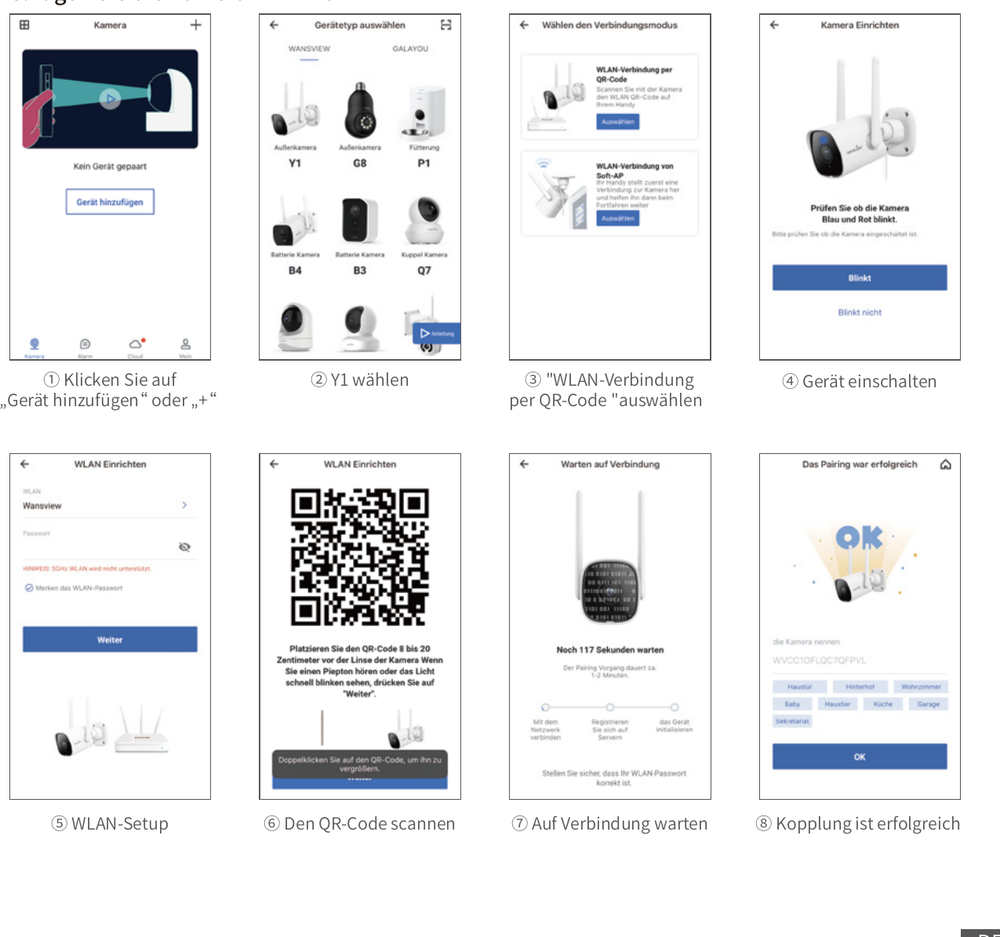
Add the camera Y1 (WiFi connection via QR code)
- Click Add Device or +
- Select Y1
- Select WiFi connection via QR code
- Power on the device
- WiFi setup
- Scan the QR code
- Wait for connection
- Pairing is successful
- The camera is online
- Live video
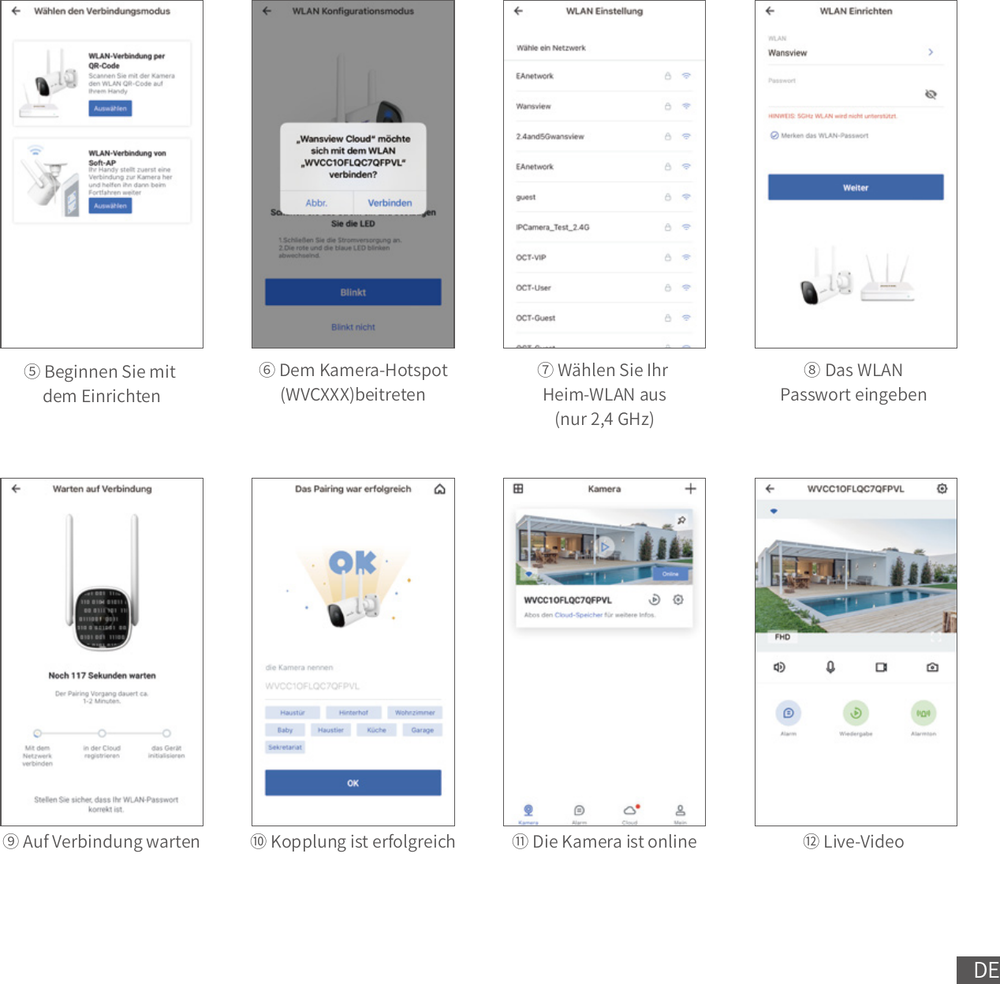
Add Y1 (WiFi connection via Soft-AP)
- Click Add Device or +
- Select Y1
- Select WiFi connection via Soft-AP
- Scan the QR code on the back of the camera sticker
- Start the setup
- Join the camera hotspot (WVCXXX)
- Select your home WiFi (2.4GHz only)
- Enter the WiFi password
- Wait for connection
- Pairing is successful
- The camera is online
- Live video
This surveillance camera only works with 2.4GHz WiFi; 5GHz WiFi is not supported. Please place the camera near the router (within 3 feet) while setting up. After a successful connection, you can place the camera in another location.
FAQ
After-Service
Manufacturer: Shenzhen Smarteye Digital Electronics Co., Ltd
Address: 206, Block 1, Shangrong Industrial Zone, No.2 Baolong Road 5, Baolong Community, Baolong District, Longgang, Shenzhen, China
- DE: [email protected]
- FR: [email protected]
- IT: [email protected]
- ES: [email protected]
Made in China.