 Wansview Cloud Docs
W9 Quick Installation Guide
Product diagram, setup, indicator lights, and FAQ for the Wansview W9 outdoor PTZ security camera.
W9 Quick Installation Guide
Product Diagram
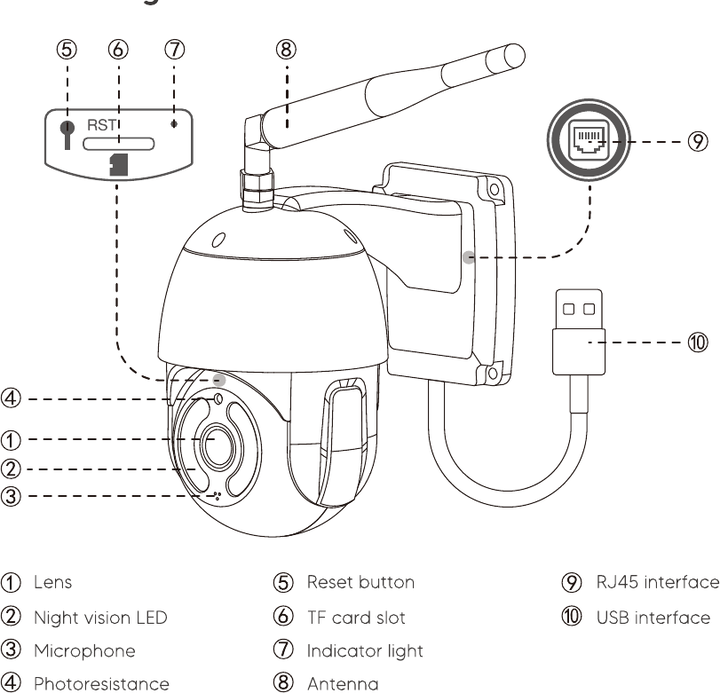
- Lens
- Night vision LED
- Microphone
- Photoresistance
- Reset button
- TF card slot
- Indicator light
- Antenna
- RJ45 interface
- USB interface
What's in the Box
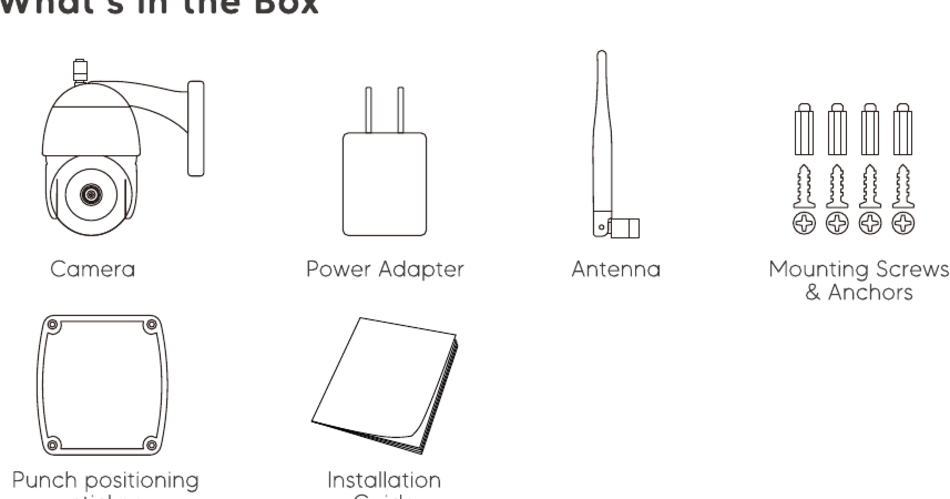
- Camera
- Power Adapter
- Antenna
- Mounting Screws & Anchors
- Punch positioning sticker
- Installation Guide
Indicator Lights Status
| Light Status | Camera Status |
|---|---|
| Red light on | Camera is powered on |
| Red and blue light alternately flashing | Waiting to connect now |
| Blue light flashing | Camera is connecting Wi-Fi |
| Blue light solid | Succeeded to connect Wi-Fi |
| Red light quickly flashing | 1. Reset camera to factory setting 2. Camera is upgrading firmware |
Please make sure your router is connected to the Internet.
Setup
Download and install the app
Go to the App Store or Google Play to search and download the Wansview Cloud app on your smartphone, or scan the QR code on the guide to get the app.
Register an account
Open the Wansview Cloud app and register an account with your email, then activate it.
Your password must be 8-16 characters, and contain at least three of the following categories: numbers, uppercase letters, lowercase letters, or special characters.
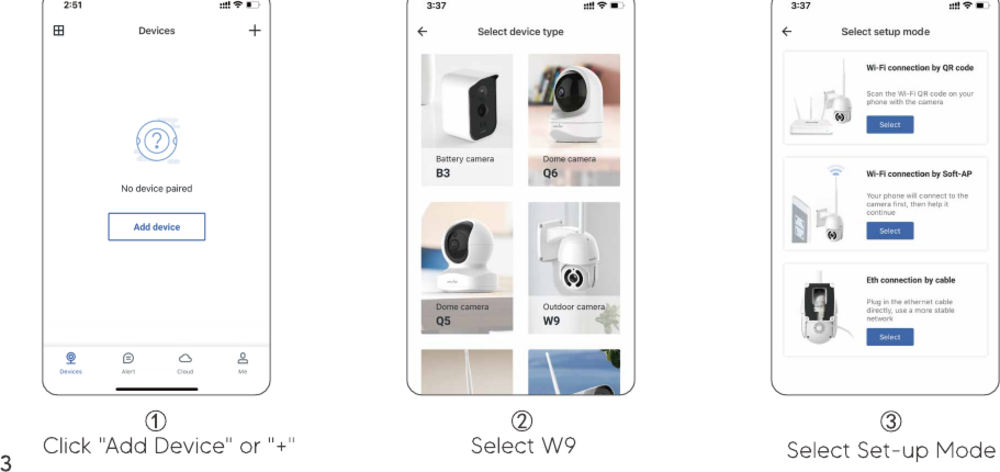
Add W9
In the app, tap Add Device or +, then select W9, then select the set-up mode (Wi-Fi connection by QR code, Wi-Fi connection by Soft-AP, or Eth connection by cable).
Complete the pairing
Follow the in-app steps: Device Power On → Wi-Fi setup → Scan the QR code → Wait for connection → Pair succeed → The device is online.
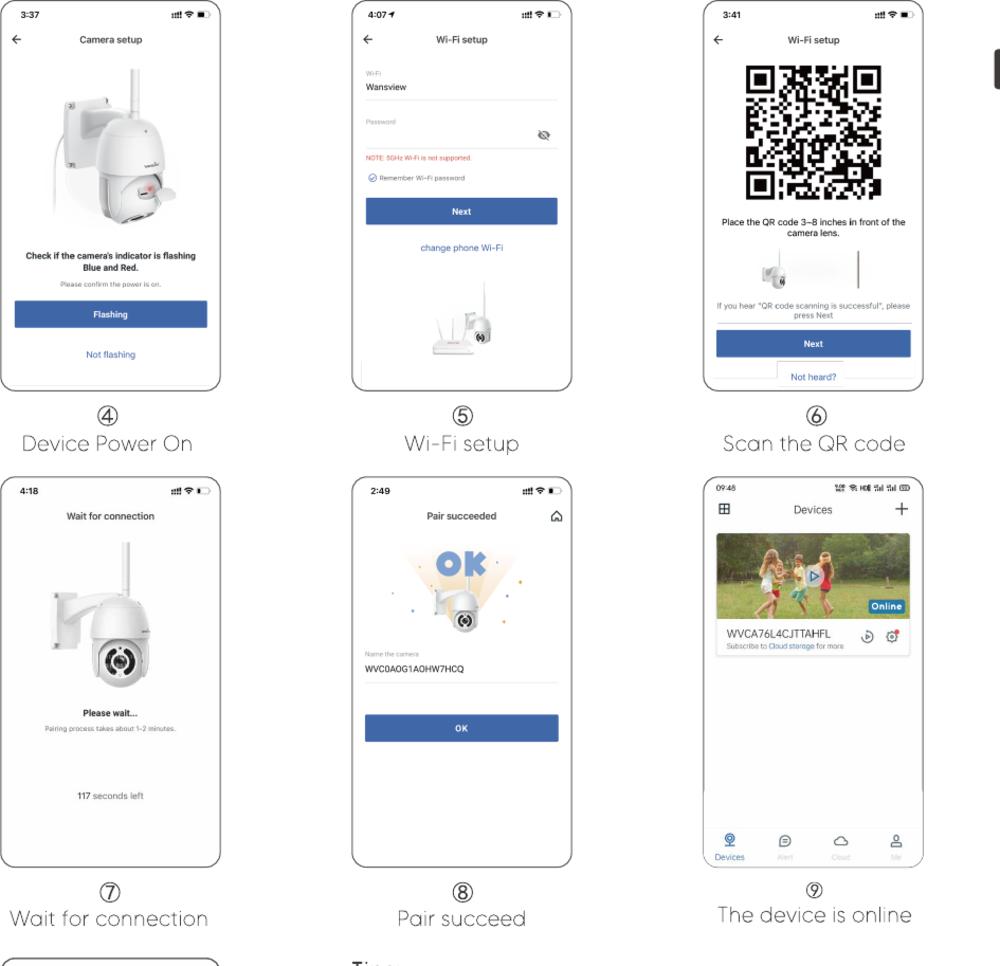
This outdoor security camera only works with 2.4GHz Wi-Fi; 5GHz Wi-Fi is not supported. Please put the camera near the router (within 3 feet) while setting up. After connecting the camera to Wi-Fi, you can place the camera in another location.